Showing posts with label cards. Show all posts

Friday, January 27, 2017

With Sympathy

Good morning!  I see some sun this morning and it is totally making this a great Friday already.  The snow just sparkles so beautifully in the sun and it has been SO gloomy lately.  Luckily, it hasn't been as cold as it normally is this time of year.  It's always nice when it snows and is warm enough to actually enjoy it.  I hope you are all enjoying your morning no matter what the weather is like.

Today, I decided to share two cards that I made using the Inky Flower Stamp Set and With Sympathy Word Die.  Layered on the Dip Dyed Ombre Paper, it made a perfect sympathy card.


I made a bunch of these all at once because I struggle with sympathy cards, especially when I actually need one.  When I come up with a nice design, I make several to ensure I have them on hand.  I hate that I need a stash of sympathy cards but it is a fact of life.  To create this cards, I chose several colors of Lil' Inker Designs Dip Dyed Ombre Paper and cut them for my card fronts.  Then I stamped along the edges using Inky Flower in colors the either complimented the color of the paper or created a monochromatic look.  I didn't want either product to outshine the other or be too flashy.  I loved the combos I came up with as they looked simple and classy.  I then cut my sentiment using the With Sympathy Word Die cut from in papers that matched the ink I used on the card.  I toyed with the placement of my sentiment for awhile before deciding to use a little vellum to help it really stand out but not break the card up too much.  Here is a look at each card individually.


I also played around with the orientation of the vellum.  I really like them both and I hope you do too!  You'll have to check out these awesome products but you should also check out the Lil' Inker Designs blog!  Today is Flashback Friday and the cards Jessica shared are AMAZING.  Also the products she used are on sale:  Perky Posies Die Set, Sending You Stamps, and the Spring Flowers Die Set.  Make sure to check it out!


Here are the products I used today:


Sunday, December 7, 2014

Lil' Inker Designs December Release Blog Hop Day 3

It's the last day of the new release hop at Lil' Inker Designs and, boy, did I save the best for last!  I love all the products that we got to show off this month but the cards I made with today's items...totally my favorite!  Lucky for you, no matter what items you are after from this release, they are all available right now in the Lil' Inker Store.  You should be coming here after visiting Amy.  If not, head on over to the the Lil' Inker Blog so you don't miss a thing.  You will want to start at the tip top of this hop!

Now it's time for my first card!


You may recognize this card from a little peek on our Facebook page!  I took a piece of watercolor paper which I cut with Stitched Mats:  Rounded Rectangles and pretty much dripped and drizzled my watercolors all over.  There was absolutely no method to my madness but I LOVE how it turned out.  Then I stamped my jewels from Girl's Best Friend Stamps in a soft gray so they didn't compete with the sentiment which was stamped with the most amazing alphabet EVER, Alphabet Gems Stamps.  I colored the letters in with copics and then stamped a coordinating sentiment from Girl's Best Friend Stamps underneath.  I finished the card off with some stars from the stamp set stamped in various colors and some fun jewels and enamel dots.

My last card is my favorite by far.  I just LOVE IT!

     
As soon as I got this Cover Up Die: Faceted in my hand, I was down in my craft room creating.  It was instant inspiration.  Seriously, I put on some space movie for the boys to watch for science so I could go make cards.  I'm sure they didn't mind one bit either.  ;)  I saw this gorgeous color combo one day browsing Pinterest and it was just screaming for this Cover Up Die.  So, the two were destined for each other.  I broke out my copics and went to town coloring triangles and while it took awhile, it was worth every minute of it.  The end result is just spectacular.  As much as I loved my background, I knew this needed a sentiment and focal point.  So, I broke out the
Stitched Mats:  Rounded Rectangles and cut some vellum which I folded over the edge to get just the size I wanted.  I embossed a sentiment from Girl's Best Friend Stamps on my vellum rectangle as well as stamping the "thanks".  It was all cute but it needed a little something more.  Thank goodness that this month's goodies include the Girl's Best Friend Diamond Die because layered on a little gold glitter paper, it finished this card off perfectly.  I almost grabbed some extra bling but I think this card has enough of that already.  ;)

So, what items do you "need" from this amazing release?  I'd love to hear all about it.  Here's what I used today:


http://www.lilinkerdesigns.com/girls-best-friend-stamps/

http://www.lilinkerdesigns.com/alphabet-gems-stamps/

http://www.lilinkerdesigns.com/cover-up-die-faceted/

http://www.lilinkerdesigns.com/girls-best-friend-diamond-die/

I really hope you guys enjoyed this release and have had a blast on the blog hop.  Enjoy your last day of the hop and
don't forget to leave comments along the way because Laura gives out a $15 Lil' Inker Designs store credit to a lucky commenter each day of the hop.  It could be you.  I'm sure I'll see you on the hop and tomorrow for another fun day of release projects.  See you then!

Chrissy Larson <---Yup, that's me!!!
Don't forget you can get the new release right now in the Lil' Inker Store!

Saturday, December 6, 2014

Lil' Inker Designs December Release Blog Hop Day 2

It's another awesome day on the Lil' Inker Designs December Release Blog Hop.  I bet you guys all had a great time checking out all the goodies and creations yesterday.  Well, today is just as awesome!  If you didn't know already, the whole release is available right now in the Lil' Inker Store.  Hopefully, you already checked out Amy and her amazing creations.  If not, head on over to the the Lil' Inker Blog so you don't miss a thing.  You will want to start at the tip top of this hop!

Are you ready for some cards?  Well, here's my first creation for today.


I took one look at all the amazing rectangles in the Stitched Mats:  Long & Skinny Rectangles Die Set and knew I wanted to make the keys on a piano.  Maybe it was my son practicing for his piano recital in the background but that is TOTALLY what I saw when I looked at them.  I didn't want a boring piano because these dies are too cool for that so, I decided to have my keys make a wave across the card front.  Then I stamped the first part of my sentiment with the Hello, Awesome Stamp set on a key and placed the Awesome Word Die just so.  To place the sequins, I just dropped a few and glued them down where they landed.  You seriously need ALL of this!

In case you are still on the fence, check these out:


Hello!!!!  The Hello, Awesome Stamp set and Awesome Word Die is just made for card sets.  Just look at how easily these came together.  I started with two already released items, the Quilted Stitched Pattern Die and Stitched Mats:  Rounded Rectangles.  Then, I went to town cutting out awesome after Awesome Word Die.  I embossed some of the sentiments from the Hello, Awesome Stamp set on my rectangles then stuck down my die.  I thought the "awesome" on each card needed a little something extra so I covered them in glossy accents.  My "awesome possum" card got a little extra dose of cute with the possum hanging from the "P".  How cute is he?

Here's the awesomeness I used today:

http://www.lilinkerdesigns.com/stitched-mats-long-skinny-rectangles/

http://www.lilinkerdesigns.com/awesome-word-die/

http://www.lilinkerdesigns.com/hello-awesome-stamps/

I had a blast with these products and I hope you liked my creations.  Make sure you keep hopping to see all the other amazing creations and don't forget to leave comments along the way because Laura gives out a $15 Lil' Inker Designs store credit to a lucky commenter each day of the hop.  It could be you.  I'm sure I'll see you on the hop and tomorrow for another fun day of release projects.  See you then!


Chrissy Larson <---Yup, that's me!!!
Don't forget you can get the new release right now in the Lil' Inker Store!

Wednesday, November 26, 2014

It's Your Birthday, DONUTS! ;)

Good morning, everyone!  Happy Thanksgiving eve.  ;)  I have a quick card set to share with you and I wanted to do it before I gorge myself on turkey and the fixings tomorrow.  I make lots of birthday cards... I mean TONS!  Our church sends out birthday cards to all the congregation members and I make every single one.  I LOVE IT!  It gives me a chance to try out new ideas and practice my mass producing skills.  It also doesn't hurt that making all those cards TOTALLY justifies needing more supplies.  Darn...shopping.  I made some fun cards this time around but I wanted to share this one with you because it is simple and so easy to make for boys, girls, men, or women.  Can't beat a card like that, right?  Well, here it is:


See what I mean?  Simple and easily adaptable.  I used the Lil' Inker Designs Eat More Donuts and Fancy Feathers stamp sets to create these cards.  I started with some cream cardstock for a base and stamped my sentiment and donut ring in chocolate brown.  Then I went crazy with different frosting colors (these two were my favs).  I added some fun enamel dots to add a few extra "sprinkles" to the card.  They turned out super cute and you can crank these out in no time which is one of the things that I love about the Eat More Donuts set.  It looks awesome if you keep it clean and simple but you can totally gussy it up and make it fancy too.  LOVE!

I hope you enjoyed my cards and that you have a wonderful time with your family and friends this holiday.  Have a wonderful Thanksgiving!

http://www.lilinkerdesigns.com/eat-more-donuts-stamp-set/

http://www.lilinkerdesigns.com/fancy-feathers-stamps/

Thursday, October 30, 2014

Lil' Inker Designs October Release Day 3


Hi everyone!  Today's the last day of the Lil' Inker Designs October Release blog hop.  I'm super excited to share my creations with you today but also bummed that the hop is over.  Luckily, I have more creations up my sleeve to share with you a bit later.  ;)  You should have gotten here via Amy's blog.  If not, you might want to go to the Lil' Inker blog to make sure you start at the beginning and don't forget, all of these awesome products are already available in the Lil' Inker Store.

First I want to share what I made using the Limited Edition Gift and Note Card Holder Die.


I used some fun ribbon to package my coffee and then die cut the Limited Edition Gift and Note Card Holder Die from a light weight red cardstock to fit my gift card.  I decorated the front of my gift card holder using the previously released Holly Jolly Dies.  Then I layered a sentiment which I stamped after masking off a portion from the Big Christmas Stamp Set over a strip of green glitter tape.  I stamped a greeting from an older set called Holly Jolly Sentiment Stamps on the inside flap.  I just love how it all came together.

http://www.lilinkerdesigns.com/limited-edition-stitched-gift-and-note-card-holder-die/

http://www.lilinkerdesigns.com/big-christmas-stamp-set/

Next up, I had some fun with the Baubled Christmas Tree Die and Stitched Script Holiday Word Dies.


 I used two tones of wood paper for this card and I LOVE it!  I used Stitched Mats:  Rounded Rectangle Dies to cut the cherry wood and then used Stitched Script Holiday Word Dies to add my sentiment to the bottom after die cutting the main image with the Baubled Christmas Tree Die.  I added this to a natural color of wood and then added all the little cut pieces back to show off the negative image of this die.  I inked up the edges with some distress ink to add a little depth.  A little bling in some of these fun circles and you have a lovely little card.  

http://www.lilinkerdesigns.com/baubled-christmas-tree/

http://www.lilinkerdesigns.com/stitched-script-holiday-word-dies/

My final card uses the amazing Seasonal Stars Die Set.  I LOVE this die set and this is my favorite card that I have created in a very long time!


I used the Seasonal Stars Die Set to cut out brown, red, and turquoise cardstock.  I added these to my pearlized card base, added a strip of vellum, and the Joy Word Die from a previous release cut from gold foil cardstock.  Simple clean and WOW...those stars are AMAZING!  

http://www.lilinkerdesigns.com/seasonal-stars-dies-set/
 
Thanks so much for joining us for my first ever release blog hop with Lil' Inker Designs.  I'm SO excited to be joining this team and getting to share the amazingly fun stamps and dies with you guys.  It's been a blast and I hope you will check out the rest of the ladies on the hop.  Leave some comments along the way also for a chance to win one of the three $15 store credits that Laura is giving out.  Here's the blog hop list:

Chrissy Larson <---Yup, that's me!!!
Have a great day and don't forget you can get the new release right now in the Lil' Inker Store!

Wednesday, October 29, 2014

Lil' Inker Designs October Release Day 2


It's day two of our amazing Lil' Inker Designs October release bloghop.  Hopefully, you are coming from Amy's blog.  If not, you might want to go to the Lil' Inker blog to make sure you start at the beginning.

You are going to love the products I'm showing today just as much as yesterday's amazing designs.  Lucky for you, all the items from the October release are already available in the Lil' Inker Store.  You can have it all on its way to you while you sit back and enjoy the inspiration all along the bloghop.  Oh!  Don't forget to comment as you go, Laura is giving away a $15 credit to 3 lucky hoppers.  Awesome!

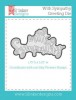
This first card uses the new Cover Up Die:  Snowflakes and, boy, is this an amazing die.  You may think I'm crazy but my favorite thing about this is the fact that there is white space.  So many cover dies that I find are crammed full of whatever shape they are using and they leave no space for your eye to rest and really enjoy what you are looking at.  I guess, to me, they can be busy.  The Cover Up Die:  Snowflakes is simple perfection.  Just look:

http://www.lilinkerdesigns.com/cover-up-die-snowflakes/

For my card, I cut two of these gorgeous die cuts, one in navy and one in vellum.  Let's see what you think.


I layered these die cuts (a bit offset) on some mirrored cardstock.  I love the little peek of the vellum around the edges of each snowflake.  Finishing the card was easy, a sentiment from the Cozy Winter Wishes Stamp Set embossed in white on vellum and some coordinating enamel dots and the card was done.  See how not every snowflake touches another?  That is why I love this so much.  Each snowflake gets its own shining moment.  Gorgeous!

Next up, I'm going to play with some more snowflakes using the Cozy Winter Wishes Stamp Set.  I wanted to make a small wintery scene with these wonderful snowflakes so I decided to use the Border Builders Die Set on this card as well.

http://www.lilinkerdesigns.com/cozy-winter-wishes-stamp-set/

http://www.lilinkerdesigns.com/border-builders-die-set/

Here's how I used them:


First up, I inked a cut from Stitched Mats:  Rounded Rectangle Dies to look like a winter sky.  Then I used Border Builders Die Set to make a hill with glitter paper and another with pearlized paper.  I stamped my snowflakes from the Cozy Winter Wishes Stamp Set in black and embossed one in silver on a bit of vellum which I thought looked awesome (I'll be doing that again!).  I finished the card off with a strip of vellum stamped with a sentiment from Cozy Winter Wishes Stamp Set and a little bling. 

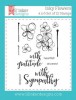
My last card uses another fun stamp set, Big Christmas Stamp Set.  These sentiments can carry a card all on their own.  Just look...

http://www.lilinkerdesigns.com/big-christmas-stamp-set/


I was wondering in a store one day with my coffee in hand and I saw the most adorable packaging.  It was wood and gold but SUPER simple.  When I saw the Big Christmas Stamp Set I knew I wanted to do a play on that packaging.  I found some wood panel patterned paper in my stash and cut the Small Bow Die from gold glitter paper to hold this awesome kraft and gold glitter tag that I had in my stash.  To make the sentiment pop with all that glitter, I cut a piece of acetate to wrap around the tag.  I stamped and embossed the sentiment in black and it really pops...no additional bling needed.  ;)

I hope you liked my cards today and I'm so happy you stopped by to see what I created with all these amazing Lil' Inker Designs products.  You better get going though, if you want to get to all the amazing blogs in today's hop.  See you again tomorrow!

Chrissy Larson <---Yup, that's me!!!
Don't forget you can get the new release right now in the Lil' Inker Store!

Tuesday, October 28, 2014

Lil' Inker Designs October Release Day 1 - OMG!

Have you ever had a really REALLY good secret that you were just dying to share but you had to wait for what felt like an eternity until you could share it?  Yup, that's how I've felt since Laura asked me to join her and the AMAZING team at Lil' Inker Designs.  To say I was flabbergasted, is an understatement.  It felt like I was in a dream world when I said, "OF COURSE!"  Then she sent me this:


I knew it was real and I was actually a part of the Lil' Inker Designs team.  I'm so excited to get to work with this wonderful group of designers and these amazing products.  This release (available NOW in the Lil' Inker Store) is going to blow you away and I hope you will hop along with us for the next few days.  You won't regret it for a second.  Hopefully, you have arrived here from Amy's blog.  If not, you might want to go to the Lil' Inker blog to make sure you start at the tip top of the hop.

I'll start by making you a little hungry first.  Who doesn't love donuts, right?  The more the merrier.  You can work them off later.  Well, the Eat More Donuts Stamp Set and Donuts Die Set are super low in calories so you can have as many as you like and after you see what I've created with them, you're going to want donuts galore.  ;)

http://www.lilinkerdesigns.com/Eat-More-Donuts-stamps/

http://www.lilinkerdesigns.com/Donuts-Die-Set/

Cute right?  Here are my cards:


I stamped the amazing donuts (Eat More Donuts) on kraft paper in some fun and delicious looking colors and then cut out a Stitched Mats:  Rounded Rectangle that would fit my sentiment perfectly.  I wrapped some twine around the rectangle and added a few enamel dots to finish the card off.  Super cute!  Donuts just scream for coffee, don't they?  That's where my next card idea came from.


I used the Donuts Die Set to create this adorable donut with some patterned paper and glossy accents.  Then I grabbed my handy dandy Coffee Cozy Stamp Set and Coffee Cozy Die Set to create my cute coffee cup.  I whipped out my Stitched Mats:  Rounded Rectangle Dies for this card also and they gave me the perfect focal area for my coffee and donut.  Can't beat that.

This release is SO jam packed with fun stuff that I have one more card to share with you today.  It uses the I'm All You're All Stamp Set and the Speech Bubbles Die Set.  I think you are going to really love these.  The stamp set is a totally unique twist on some fun sentiments.  Just take a look:

http://www.lilinkerdesigns.com/Im-all-youre-all-stamps/

http://www.lilinkerdesigns.com/speech-bubbles-die-set/
 
How's that for fun?  I think you'll agree they make for a pretty cool card.


I combined the I'm All You're All Stamp Set and Speech Bubbles Die Set with my favorite Balloon Dies to create this fun card which is layered on, you guessed it, Stitched Mats:  Rounded Rectangle Dies.  I had some fun with this turquoise, teal, gray, and white combo and have you ever seen a more fun way to say happy birthday?  I'm all..."LOVE IT!"  ;)

I hope you enjoyed my creations and will join the rest of the team on the hop.  You'll want to leave comments along the way because Laura gives out a $15 Lil' Inker Designs store credit to a lucky commenter each day of the hop.  It could be you.  I'm sure I'll see you on the hop and tomorrow for another fun day of release projects.  See you then!

Chrissy Larson <---Yup, that's me!!!
Don't forget you can get the new release right now in the Lil' Inker Store!

Thursday, September 18, 2014

A Bit of an Oops!

If you are looking for my CAS(E) this Sketch post for the week, it's below.

Boy, did I discover a big oops today!  I was looking through my post list and realized that the super fun post I had created for Sept 12th, didn't publish!  UGH!  Apparently, I had gone in and made changes and hit "save" instead of "publish".  So, it was sitting there in draft form this whole time.  Some days!  So, since you missed out on the fun of that post.  I've tossed the card in with this one giving me two cards to share!  How fun is that?

First up, a card I made using the Reflections Kit and Sail Away Sayings stamp set from the Sweet Stamp Shop.


I used three of the cards from the Reflections kit and cut them to create a fun sunburst type base for my light house.  I stamped and used a circle punch to cut out my light house and sentiment.  I colored the stripes and the word "light" in the stamped image to reflect the colors of the card.  I layered this whole thing on some fun polka dot paper and added some bling to finish things off.

Next, I used a fun die and the Reflections kit to make this fun card.


This card couldn't have been any easier to create.  Nicole has made some cards in this kit that can hold a card all on their own.  They are awesome!  I found some nice bold chevron paper to really make this card pop.  Then I diecut the Congratulations from a coordinating color, added some bling and the card was done!  Easy!  I have to say that this is one of my favs!  I just love how bold and graphic it is.

I hope you liked my cards today.  So SO sorry about my big oops.  Go check out the Reflections kit and all the fun stamps at the Sweet Stamp Shop.  You'll have a blast!