Showing posts with label Holly Jolly. Show all posts

Thursday, December 21, 2017

Advent Calendar Extravaganza


I hope you are ready for some fun today!  The Lil' Inker's Design team is joining with Taheerah for her amazing Advent Calendar Extravaganza!  I just love this amazing event every year and the surprise each day is such a fun treat! I hope you will enjoy my creation and make sure to check out Taheerah's blog for all sorts of fun!  You won't want to miss all of the other days!

Advent Calendar Extravaganza is -the- festive event of the season! This ‘hop with a twist’ was dreamed up by Taheerah Atchia and features surprise destinations each day! Joining in the fun with Taheerah are ONE HUNDRED special guests - each serving up some fantastic Christmas inspiration! Just like an Advent Calendar, you’ll never know where you’re going to be visiting next until you ‘open the door’!

And that’s not all! With 25 *amazing* sponsors taking part as guests as well, your crafty wish list is bound to get a boost with a chance to win a prize EVERY SINGLE DAY!!

Join in the fun every day at taheerah-atchia.com to see what special surprises await behind the door!

Today Lil' Inker Designs is up on Taheerah Atchia's Advent Calendar Extravaganza.  A few of us joined Laura in creating some fun projects using the amazing Lil' Inker Designs products.  Here's what I created:


As we were hanging up ornaments this year, I realized that Loki did not have a kitty's first Christmas ornament!  I looked around and did not like anything I could find online so, I decided to stitch my own photo ornament.  You would be surprised just how easy it was!

1. First, I cut various sizes of the Dual Dotted Circles. I cut 2 of the largest from gray felt and created a collar that would hold my photo by cutting the next two sized circles down layered inside one another.  Then, I stitched and finished the inside edge of the red frame so that it would not be attached to the gray circle and would leave me a lip to insert the photo under.

2.  I attached the red circle frame to the top gray circle by stitching the outside circle to the gray stitching through both layers of felt.

3.  I added some fun using the Mixed & Stitched Alphabet Die Set to display the year and Holly Jolly Dies for a fun bit of holly.  These were attached with a fabric glue but you could give them a stitch here and there if you want to make sure they are extra secure.  Be sure not to stitch into the open photo area thought.  I added some glitter berries to my holly with Stickles.

4.  Finally, I stitched both gray Dual Dotted Circles together and stuffed it with a little fluff before inserting a photo that I trimmed to fit under the lip of the red circle frame.  You could use a bit of adhesive or double sided tape on the back of the photo for extra security but I was surprised by how well it held in place with nothing more than the felt layered over the photo.

Here's a closer look and the completed project.  As you can see, I stitched a piece of green to the top to create a holder for the hook:


I hope you enjoyed my project and will join us by checking out the Advent Calendar Extravaganza.  Enjoy all the awesome projects and maybe win a prize!  Have a great one!  


Here's what I used today:

https://www.lilinkerdesigns.com/dual-dotted-circles-dies/#_a_clarson   https://www.lilinkerdesigns.com/holly-jolly-dies/#_a_clarson   https://www.lilinkerdesigns.com/mixed-stitched-alphabet-die-set/#_a_clarson

Tuesday, October 25, 2016

Lil' Inker Designs October Release Day #2


It's day two of the Lil' Inker Designs New Release Hop and I get to share even more fun goodies with you today as well as a new prize for commenters!  I'm sure you've already been eyeing all the awesome new items, lucky for you, you can get it all right now in the Lil' Inker Store.  Hopefully, you checked out all of Karen's amazing creations before hopping here.  If not of it you get lost along the hop you can always find your spot by going to the Lil' Inker Blog.  For now, I'm ready to show off some more fun stuff!

First up, I decided to try my hand at lighting a card up and this Baubled Christmas Wreath Die seemed like a perfect shape to light.  I paired it with the new Merry Christmas Word Die and some previously released items to make this enlightening card.  ;)


I started by card by cutting my wood paper with the Stitched Mats: Dual Stitched Rectangles.  This gave me the layers I needed to create my circuit.  I embossed the top rectangle using the Quilted Stitched Spirals Die.  Next, I cut my Baubled Christmas Wreath Die from green and added a layer of vellum to the back, trimming around the edges.  The vellum hides my circuitry and bulbs while also softening and dispersing the light.  I added my shiny red Merry Christmas to the wreath and added some holly using the Holly Jolly Dies.  I arranged the holly over the spot where you could press to light the wreath.  You can find a ton of YouTube videos on how exactly to create a lighted card so, I won't go into the exactly layout of my circuit.  After I had my battery and lights in place, I added my wreath with some foam tape to finish the card.  Here's a closer look at the card both lit and unlit:


Next up, I created this simple and fun shaped card using the new Merry Christmas Border Die.


I started with a cute holly paper cut using the Wonky Rectangles Dies.  I cut another Wonky Rectangle from a vellum and a green patterned paper.  I layered the vellum cut over the holly paper to add a soft touch.  Then, I used the Merry Christmas Border Die to divide my green rectangle before adding it to the front.  I loved the look of it but felt it needed a touch of holly to finish it off.  So, I used the Holly Jolly Dies and an enamel dot to complete everything.  Here's a closer look:


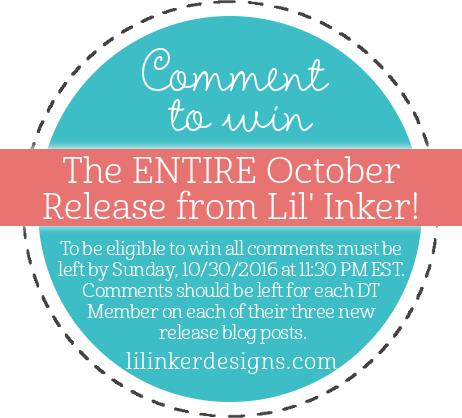
I hope you enjoyed my creations and will join the rest of the team on the hop.  You'll want to leave comments along the way because Laura has decided to shake things up and give away the ENTIRE RELEASE to one lucky commenter.  It could be you.  I'm sure I'll see you on the hop and tomorrow for another fun day of release projects.  See you then!

Chrissy Larson <---Yup, that's me!!!

Don't forget you can check out the new release right now in the Lil' Inker Store and you can get all the goodies I used today.  Here's what I used:

https://www.lilinkerdesigns.com/baubled-christmas-wreath-die/

https://www.lilinkerdesigns.com/merry-christmas-word-die/

https://www.lilinkerdesigns.com/quilted-stitched-spirals-die/#_a_clarson

https://www.lilinkerdesigns.com/stitched-mats-dual-stitched-rectangles/#_a_clarson

https://www.lilinkerdesigns.com/merry-christmas-border-die/#_a_clarson

https://www.lilinkerdesigns.com/wonky-rectangles-dies/#_a_clarson

https://www.lilinkerdesigns.com/holly-jolly-dies/#_a_clarson

Friday, October 9, 2015

Lil' Inker Designs October Release Blog Hop Day #3


Well, it's the last day of our new release hop at Lil' Inker Designs and I'm super excited to show off my last project but before we get into all that I have to make sure you are coming here after visiting Sarah.  If not, head on over to the the Lil' Inker Blog so you don't miss a a stop on the hop.  You won't want to miss a thing!  While you are visiting the Lil' Inker Blog, make sure you go check out the Lil' Inker Store where all of the new release goodies, and a whole lot more, are ready and waiting for you to put in your cart.  Now it's time to show off some of my favorite products of this release!  I've only got one set of projects today but I think you'll really like it.


I went a little crazy with the Triangle Treat Holder Die.  How could I resist though?  They are just too much fun! 


I just couldn't wait to create an adorable Santa with the new Make A Santa Die & Stamp Bundle.  I cut out my beard and gave it a little texture with the Cover Up Die:  Stitched Woodgrain.  It was so cute with the heart positioned right in the middle of Santa's beard!  When I had all my Santa pieces cut (including an extra hat cuff which I cut in a flesh tone to use as Santa's face),  I assembled them all on my red Triangle Treat Holder.  Santa's hat needed a little extra fun so I added some holly using Holly Jolly Dies.  I tied my treat holder closed with some red and white twine and a glittery "WISH" from Holiday Word Die Tags and a sentiment from the Make A Santa Die & Stamp Bundle on a Sentiment Flag Original Die.  What fun way to give someone a little treat or to even use as an ornament! 

I couldn't stop at just one Triangle Treat Holder.  I cut two more our of fun festive Christmas paper and tied them with the same red and white twine as Santa.  I attached glittery cuts from the Holiday Word Die Tags and then a little extra shine with golden bells from the awesome Jingle Bell die set.


They look so cute spilling out peppermint candies or even all tied up like the one below.


I hope you enjoyed my creations and will join the rest of the team on the hop.  You'll want to leave comments along the way because Laura gives out a $15 Lil' Inker Designs store credit to a lucky commenter each day of the hop.  It could be you.  I'm sure I'll see you on the hop and tomorrow for another fun day of release projects.  See you then!


Chrissy Larson <---Yup, that's me!!!

Don't forget you can check out the new release right now in the Lil' Inker Store and you can get all the goodies I used today.  Here's what I used:

http://www.lilinkerdesigns.com/triangle-treat-holder-die/#_a_clarson

http://www.lilinkerdesigns.com/make-a-santa-die-stamp-bundle/#_a_clarson

http://www.lilinkerdesigns.com/cover-up-die-stitched-woodgrain/#_a_clarson

http://www.lilinkerdesigns.com/holly-jolly-dies/#_a_clarson

http://www.lilinkerdesigns.com/sentiment-flag-original-die/#_a_clarson

http://www.lilinkerdesigns.com/christmas-word-tags-dies/#_a_clarson

http://www.lilinkerdesigns.com/jingle-bell-die-set/#_a_clarson