Showing posts with label November Release. Show all posts

Wednesday, November 29, 2017

Bridal Couple - Frantic Stamper

December is SO close that I can smell the candy canes!  Are you ready for it?  I'm getting there and have been crazy busy with Christmas card making so, it's nice to share a non-Christmas card with you guys today.  I hope you have enjoyed seeing the Frantic Stamper November Love and Music release products!  I had so much fun with the products and really love some of the cards I've made.  I can see making more and more cards with them and the Bridal Couple Card Builder Die is one I will use again and again!


I just love the clean and modern look of this die.  I started by cutting the white layer that ties everything together...dress and tux.  Next, I cut my groom a stone colored suit with black buttons and a pink bow to coordinate with the bride's belt.  I layered my completed couple on a coordinating patterned card base and I love how simple and elegant it is.  Wedding, anniversaries, prom, homecoming....so many occasions that I can see the Bridal Couple Card Builder Die being used for.  Here's a closer look:

Thanks so much for stopping by today.  I hope you are having a wonderful week.  See you later!

Sunday, November 8, 2015

November Reverse Confetti Blog Hop


Have you enjoyed all the peeks so far on the Countdown to Confetti?  Well, now you can get all the amazing Reverse Confetti goodies for yourself!  They are available now, just check them out in the Reverse Confetti shop and while you're at it, join us on the new release blog hop.  You should be stopping in here after visiting my good pal, Leigh Penner.  If you missed a stop on the hop, make sure you check out the Reverse Confetti Blog to start from the tip top!  You won't want to miss a thing!

For the hop, I created this cute little card using some new release items mixed with a little from the October release!


I started with this adorable Quick Card Panel from the limited edition Holly Jolly set and die cut it using the Topped Off Tag Confetti Cut.  I just love how the Quick Card Panels go so well with the new tags!  It's awesome!  I added the cute topper to the tag using the Bubbly Tag Toppers Confetti Cut.  It's SO cute!!!  The Hang Ups Confetti Cut was just perfect to add a little finishing touch to this tag along with the most adorable reindeer EVER from Jolly Holiday which I colored with copics and gave a glittery red nose.  I added my tag to a green card base which I layered some polka dot paper, with a strip of green stamped with the snowflakes from Jolly Holiday and a little strip of red glitter.  I finished the card off with a few sequins and I hope you like it!


I hope you've enjoyed my creations for this release and don't forget that everything is available in the Reverse Confetti shop right now!  Next up on the hop is Stacey.  I just love her layering and pattern combos!!  Don't forget to visit the Reverse Confetti Blog if you get lost along the way.  Ha ha!  Have a great day and thanks for stopping by.   

Friday, November 6, 2015

Countdown To Confetti Day Two


Are you ready for another day of fun Reverse Confetti peeks?  It's day 2 and I've got another fun gift to share with you!  I just know you are going to love this release so, don't forget to check out the Reverse Confetti Blog for even more sneak peeks and inspiration.

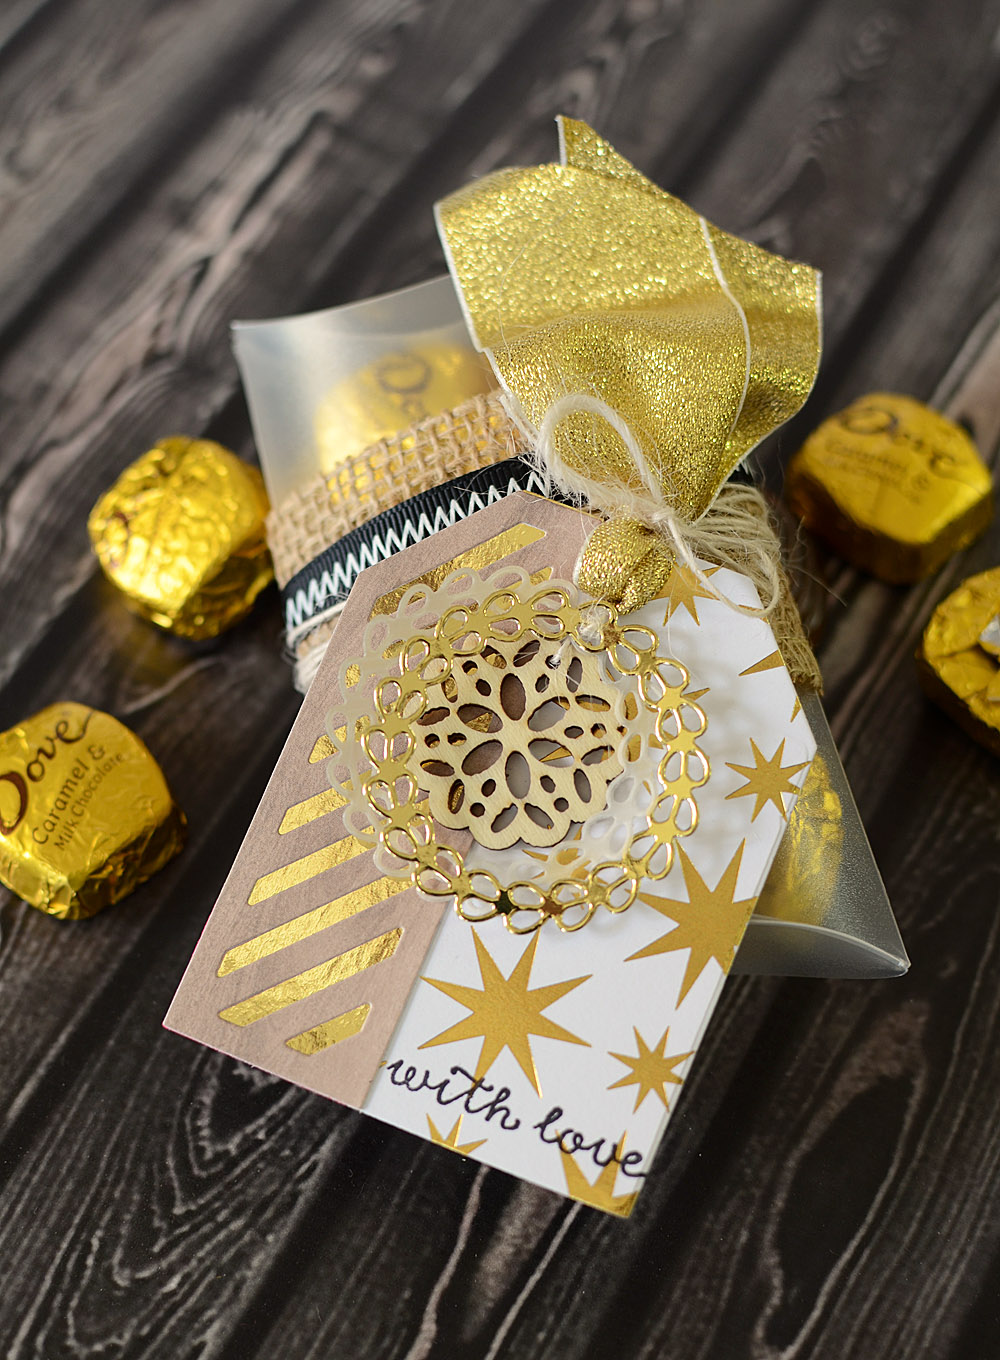
Here's my fun project using some of the new release items coming November 8th.


For this project I used one of the Frosted Pillow Boxes from last month's release to make this cute gift of candy.  I started by wrapping the pillow box in burlap, and black zigzag ribbon, and some twine to hold the tag I created.  My tag was created using the new Topped Off Tag Confetti Cuts and some gold star patterned paper.  I cut the side panel from wood veneer  and layered a piece of gold foil paper under to create gold stripes.  I stamped a sentiment from With Love in the corner of my tag and then cut a vellum and gold wreath using the previously release Wreaths Confetti Cuts.  I used twine to tie my wreath cuts to a wood veneer snowflake and hung that from the ribbon at the top of the tag.  I love how it dangles!  I then used twine to attach the tag to my gift.  


I hope you enjoyed my peek at the goodies that will be available from Reverse Confetti on November 8th!  Don't forget to check out all the other amazing designers' creations by visiting the Reverse Confetti blog.  While you are hopping along, don't forget to comment for your chance to win a $15 gift certificate and you can up your chances at a win by visiting the Reverse Confetti Facebook Page and leaving a comment for another chance at a $15 gift certificate (all the details can be found on the Reverse Confetti blog).  So, get going and don't forget to comment!  ;)


Thursday, November 5, 2015

Countdown To Confetti Day One


Good morning everyone!  It's day one and my first time showing off some new Reverse Confetti goodies as a 'Fetti Friend.  I'm SO excited!  You guys are going to love this release, I sure do, and I can hardly wait to share it all with you.  This month's release is perfect for gift giving and with the holidays right around the corner, I know you are going to enjoy the new stamp sets, Confetti Cuts dies, and the Quick Card Panels!  Don't forget to check out the Reverse Confetti Blog for even more fun!

Today, I'll be sharing a fun little coffee cup gift adorned with the perfect gift card holder!


I started my shaker gift tag by cutting some fun zigzag paper with the new Gift Card Holder Tag with the smaller rectangle die positioned to cut a window.  I also cut a back from a black triangle patterned paper by removing the small rectangle die and positioning the small slit opening die toward the top portion of my base tag to create an opening to insert my gift card into my tag.  To make the shaker, I used some acetate which I cut just larger than the window opening, filled with sequins, and sealed shut.  I used the little Hang Ups to add a hit of gold at the top of my tag to bring in the gold from the sequins.  I felt the green from my gift card needed some representation on my tag so I stamped "thanks" using Alphabetical on a piece of vellum and put a small strip of green glitter tape along the bottom before wrapping it around my tag.  Now for the inside!


I wanted a little something special on the inside when the gift card was removed and a sentiment from With Love was just what the doctor ordered.  I stamped this on my base tag layer (with the slit) and embossed it in gold.  I think it adds just the right touch to say thanks and I care. 


I hope you enjoyed my peek at the goodies that will be available from Reverse Confetti on November 8th!  Don't forget to check out all the other amazing designers' creations by visiting the Reverse Confetti blog.  While you are hopping along, don't forget to comment for your chance to win a $15 gift certificate and you can up your chances at a win by visiting the Reverse Confetti Facebook Page and leaving a comment for another chance at a $15 gift certificate (all the details can be found on the Reverse Confetti blog).  So, get going and don't forget to comment!  ;)